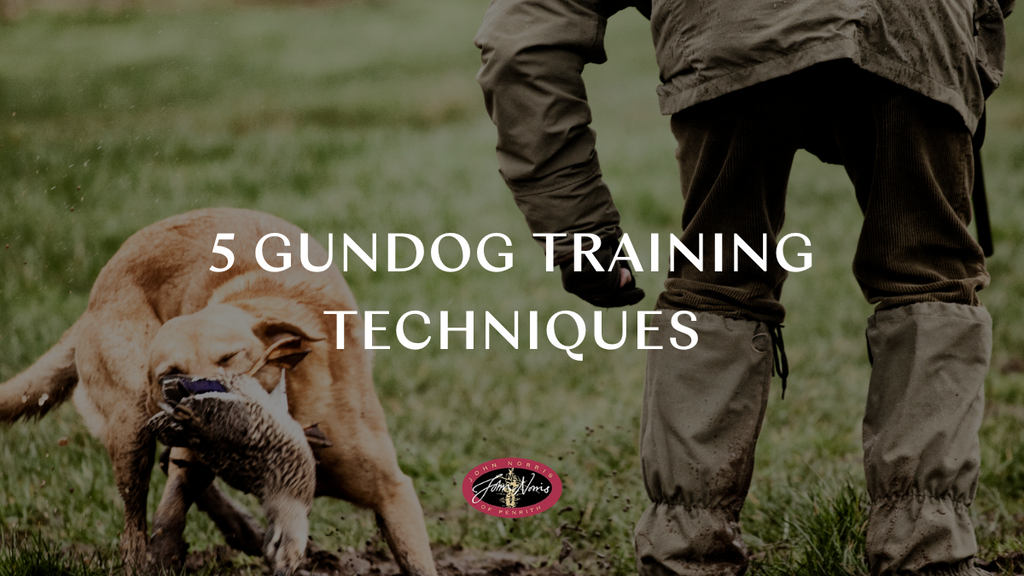
5 effective gundog training techniques: What is gundog training
Training any dog requires a lot of work, but training a gundog is another skill altogether.
As well as the usual sit, heel, stay and other general commands, and training your dog to become comfortable with a dog lead, most gun dog owners will want their dog to be able to recall and retrieve their game.
It requires a lot of hard work, persistence, dedication and patience but the results can be incredibly beneficial.
Dog training issues
Common problems with training to recall and retrieve often include:
- The dog doesn’t have a natural drive to recall the dummy
-
The dog loses interest in the dummy
-
The dog drops the dummy too soon or – the opposite – refuses to give up the dummy
-
The dog recalls the dummy but then forgets to bring it back
-
The dog only drops the dummy instead of placing it into the owner’s hand.
All of these are common issues experienced by many gun dog owners and many times, just part of the training process. In a small number of cases though, working through these problems should be done with the help of a professional, as it all too easy to be too forceful and put your dog off training sessions altogether.
However, there are a few simple techniques you can use to resolve these problems. Though they’re not always fast fixes, they can be greatly rewarding when they pay off.
These techniques and tips don’t require any fancy equipment or take any more time than your usual training sessions. They can also even make training sessions more fun for you and your dog – he gets the structure and specifics he needs and you get a dog with a willing desire to please.
The trick to training your gundog is to break things down into very small steps and only train when you are relaxed.
If your dog is a puppy, then you can definitely implement these strategies as part of your initial training. However, there some tips and special conditions that you should be aware of when training a puppy - be sure to check these out down at the bottom of this article.
Let’s take a look at these 5 gun dog training techniques that you can start to implement with your dog today.
1. The ‘Morning Routine’ method
The Morning Routine method involves using the dog’s natural habits to encourage desirable behaviours when out on the field. This takes the pressure off your dog by not expecting a perfect sitting delivery.
-
If your dog regularly brings you a toy after a period on his own – say, in the mornings or when you’ve been at work – lift up the toys or leave a couple of chew toys around (if he’s a chewer) and have dummies placed around the house but out of reach.
-
Next time he is looking for something to greet you with, grab a dummy from the nearest hiding spot and give it to him. Just remember to take it back and make a fuss of him before he drops it.
-
Repeat this often and implement the routine next time you’re out and about training. This will take the pressure off him and make him more willing to comply.
2. How to train a dog with treats
Treats can be a handy way of ‘transitional training’ your dog, but there are a few rules to be aware of.
-
Always treat from the hand, not the pocket. This is because your dog is smart enough to know that in order to take a treat from your hand, he must let go of the dummy.
-
Alternatively, you can use a ‘retrieving roll’ - a canvas wrap that can be wrapped up tight and contain a toy, ball, dummy, small bird, anything. It also has a little pouch where you can insert a treat.
The only way for your dog to get the treat is to bring back the retrieve to you. Receiving a treat every time he does this will help to build his confidence. -
Once he gets the hang of retrieving the roll to your feet, you can start to only give him the treat when he puts it in your hand. Eventually, with a bit of time and patience, you will not need the treat at all.
3. Training with a dog clicker
The Clicker method has been used for years to train gun dogs to retrieve, and has shown to be one of the most effective methods.
As It involves a precise delivery procedure, it is a useful solution for poor delivery.
However, it cannot be mastered overnight. Clicker training may take weeks to complete and is not a substitute for natural retrieving desire. Clicker training is gentle and unobtrusive, but be sure to keep it separate to other training practices.
Step 1: Charging the clicker
-
‘Charging’ the clicker means teaching your dog to associate it with food. To do this, have you and your dog in a quiet room together with no distractions. Click and immediately throw him a treat.
-
Wait till he has lost interest and repeat. Continue to click and treat (C+T) for several minutes, ensuring your dog is doing something different from the last time, each time you click. You don’t want to wrongly associate the click with any other behaviour.
-
After at least 20 times of successful C+Ting, put the clicker away and wait at least two hours before repeating.
-
Over several sessions across a few days, your dog should reach the stage where he is clearly expecting a treat when he hears the click, no matter what he is doing. Feel free to extend the gap between the click and the treat gradually – but do not disappoint him or leave the gaps too long.
Step 2: Picking up the dummy
-
To introduce the dummy, place it on the floor near your dog. C+T when he ‘looks’ at the dummy.
-
Repeat until your dog starts to approach and take interest in the dummy. Then, create an imaginary radius of 3 or 4 feet around the dummy and C+T only whenever your dog comes within that radius.
-
Shrink the circle gradually each time the dog comes within the radius three times in a row. Repeat until the dog touches the dummy.
-
Now, only C+T when your dog touches the dummy. Keep going till he does it five times in a row.
-
Work your way up like this to a nose touch, a sustained nose touch, any open-mouthed contact, deliberate grasping of the dummy, or any action which involves the dummy being lifted off the ground at either end. Continue to C+T for higher lifts and then eventually, C+T when the dummy is lifted off the ground completely.
-
Don’t push ahead until your dog is earning C+Ts regularly. If he stops earning clicks, back up a few steps and repeat the process.
Step 3: Holding the dummy
-
Once you’re at the stage where your dog picks up the dummy and drops it expectantly for his treat, wait a few moments before C+Ting. Don’t wait too long – just enough to make him notice.
-
When he starts to hold the dummy in his mouth for a couple seconds longer, C+T again. Ignore any movements where he drops the dummy immediately.
-
When you dog is performing consistent 2 second holds, extend to a 3 second, then 4, 5, 6 and so on.
-
Some dogs will be inclined to hold onto the dummy longer if you take a couple of steps back. Others are more likely to hold if you stay very still. Experiment to see what works for your dog.
-
Remember to never go too long without giving him his reward!
Step 4: Delivering the dummy
There are different ways of doing this part, none of them right or wrong.
-
First and foremost, never try to take the dummy from your dog’s mouth. He must first be taught to ‘spit out’ before he can deliver.
-
If your dog doesn’t spit out the dummy when he hears the click, encourage him by showing him the treat; holding it close to his nose, or getting better treats!
-
Still starting with the dummy on the floor, C+T any movement towards you whilst he is still holding the dummy (don’t wait for him to reach you). Take a step or so back, patting your leg or gently saying his name to get him to approach you.
-
When the dog moves towards you five times in a row, you can then begin to only C+T when he reaches you. Don’t C+T if he spits out the dummy before reaching you. Do C+T when he is right in front of you.
-
Practice this over different directions, across different distances.
-
Once your dog approaches you consistently five times in a row, you can then start to add a sit. This is optional, but does encourage the dog to lift his head before giving you the dummy and makes him less likely to shuffle about.
Step 5: Delivering to hand
-
Don’t be surprised if your dog drops the dummy as soon as he sees your hand move, as he will be used to receiving treats by now!
-
To overcome this, C+T in small steps as the dog continues to hold the dummy when you wiggle one finger; when your hand makes a more obvious movement; when you move your hand slightly towards him and then further towards him; when you hold your hand under his mouth and take it away again, all before having him drop the dummy to the floor.
-
Once you’ve got that down, you can then raise your hand to touch the dummy and C+T when your dog lets go.
-
Gradually, you will be able to replace the C+T with a “release” command (or another word, like “give” or “dead”). At first you will follow the command with the click, but eventually the command will replace it altogether.
4. The ‘Sit & Wait’ technique
Very often, owners will complain their dog drops the dummy too quickly after retrieving. This is a common problem and can be due to owners’ ‘over-keenness’ to take the dummy from the dog.
At no point should you ever start to push the dummy into your dog’s mouth as this can turn the practice into a negative exercise. Sometimes overcoming this problem can require the help of a trainer but the Sit & Wait technique can be a simple and effective solution.
-
Using C+T, treats or your usual training method, get your dog to sit for a few moments when he has the dummy in his mouth, instead of immediately taking it from him.
-
This allows the dog a few moments to feel good about himself and feel confident about what he has done. It’s incredibly important here not to hurry.
-
If your dog is still young and dropping the dummy after you’ve progressed to a heavier, say, 1IB dummy, try going back to basics with a small canvas puppy dummy that he will be less reluctant to drop.
-
Perform your normal retrieve as usual, but as your dog approaches you take a step back and start to walk away. Encourage him to walk at heel with the dummy in his mouth and as he does, give him lots of praise and make him feel really good about what he has achieved.
-
Use the same dummy each time for this exercise so your dog will bond with it and be less likely to let go.
5. The ‘Open & Praise’ method
Sometimes dogs can be reluctant or just plain refuse to give up the dummy. This is obviously not ideal, but the worst thing you can do is to get into a wrestling match with him. It tends to be more common with house pet dogs.
The ‘Open & Praise’ method is a gentle way of encouraging your dog to release the dummy, in exchange for a valuable reward.
-
Get your dog to sit quietly in front of you when he has the dummy in his mouth.
-
Encourage him to offer it by placing one hand under his jaw and using the thumb and finger of the other hand to gently open his jaw, giving him lots of praise and encouragement as you go.
-
As you do this, also use the word “dead”. Soon your dog will realise that he will be rewarded for dropping the dummy whenever he hears the word “dead”.
-
Consistent training is key in this area, to keep your dog from returning to old habits.
How to train a puppy
-
If your dog is a puppy, you want to be careful not to begin gundog training too early. Dogs are always learning, so any younger than eight months and it’s likely you’ll have to re-teach a lot of the skills later on.
-
Praise your puppy any time he picks up a toy. This will encourage him to retrieve when out in the field. Similar to the ‘Morning Routine’ method (see below), it’ll prevent him from chasing the game and neglecting to bring it back.
-
Try to intersperse training exercises with general walking and play. For example, memory retrieval is a very easy technique you can feed into your regular walks. This is where you’ll drop a dummy but encourage your pup to walk away from it, staying alongside you on the lead. After a reasonable distance, let him off the lead to retrieve the dummy. Reward him when he does.
-
Don’t overdo training sessions, or make your puppy repeat too many tasks or retrievals at once. This can cause damage to the joints, which cannot be undone. If you have children or an older dog, your pup may already be getting more exercise than you think!
Dog training on a lead
Dog leads are an excellent tool for training gundog puppies.
Training your dog to be comfortable with a lead will provide you greater control when out on the field, as it is useful for calming your dog down if he gets too excited, distracted, or does something wrong. Some types of lead are also great for teaching your dog to heel.
If your dog is a puppy, it’s a great time to get him or her comfortable with a dog lead - the earlier the better.
Here’s how you might go about it:
-
Place the lead around the puppy’s neck, pushing the stop to the correct position.
-
Allow your pup to drag the lead around with him as he plays. Don’t try to approach it straight away, but instead give him some time get used to the lead.
-
Over time you will gradually start to pick up the end of the lead. If your puppy shows any sign of stress, however, drop it immediately and encourage him to come back to you. Lavish him with praise when he does so.
-
Do this for just a few minutes a session. Eventually your puppy will feel comfortable with you holding the lead, and walking alongside you. Never allow your puppy to become frightened or stressed. Treats can be used each time your puppy stays calm when you pick up the lead, to help him associate the lead with a reward.
Remember, a rested dog is an attentive dog, so be sure to give your dog the best rest possible with one of our luxury dog beds!
If you’re currently training your gun dog for the first time, have a go at some of these techniques for sustainable, step-by-step and enjoyable training. You might want to also check out our other article on gun dog training tips and equipment.